Table of contents
TrackMasters supports the addition of new vehicles via modpaks. There is no limit to how many vehicles can be added to the game, but vehicles from the base game cannot be modified or removed themselves.
Tools
In addition to the traditional packing tool and text editor, you might need a 3D modelization software like Blender or Autodesk 3DSMax. If this is the first time you make a vehicle for TrackMasters, you might aswell want to check out the vehicle editor.
Although normally included with the game and present in the game's root directory, you can download it below if for any reason you are missing it.
CAREDITR.EXE
651 kB
Mon Mar 22 2021 15:51:41 GMT+0100 (Central European Standard Time)
"What vehicles are made of"
Each vehicle is made of at least two files :
- A definition file, which is a YML text file giving all the informations about said vehicle. This is the file that is edited and saved by the vehicle editor and where most of the works happen.
- A vehicle model of the OBJ format that will be used by the game to display the car. Neither textures or materials are required as all vehicles use the same texture. See the model.
- Zero, one or two tire models (OBJ format aswell) depending on if you want your vehicle to use the default tires (zero), a custom tire model (one), or a custom tire model for the front tires and another custom model for the rear tires.
The definition file
The vehicle definition (internally called vehicle sheet) contains a lot of information, ranging from visuals (tires position, headlights position and color, ...) to handling (max speed, acceleration). This file is a YML text file, and is expected to contain the following informations:
| Property | Type | Default value | Description |
|---|---|---|---|
| Id | text | N/A | MUST be filled with the ID of your vehicle, or it will not be loaded. Can be any string. |
| ModelPath | text | N/A | The relative virtual path to the OBJ model used for this vehicle. |
| ColorCount | number (0-2) | 2 | How many colors can be picked for this vehicle (zero, one or two) |
| PitchMultiplier | number | 1 | By how much will the engine sound of the car be increased or lowered when accelerating or deccelerating |
| EngineType | text | MEDIUM | Can be either HEAVY, LIGHT or MEDIUM. Affects the engine sound and the behaviour of its pitch. |
| Weight | positive number | 2 | The heavier a car is, the more likely it is to push other cars around when bumping in them. |
| Acceleration | positive number | 0.75 | At which speed does the vehicle reach its maximum speed. |
| MaxSpeed | positive number | 25 | The maximum speed that this vehicle can reach. Note: This value uses an arbitrary unit, where each unit is equivalent to 4kph. A max speed of 10 = 40 kph. |
| TurnSpeed | positive number | 3 | How fast does the vehicle reach its maximum turn amplitude when turning. |
| MaxTurn | positve number | 4 | How tight this vehicle's turns can be. The higher this value is, the tightest the vehicle will turn. |
| ForwardFriction | positive number | 2 | The higher this value is, the more the vehicle will deccelerate naturally when no inputs are given. |
| TurnFriction | positive number | 5 | In absence of steering input, the higher this value is the quicker the vehicle's wheel will reset. If this value is too low, a single short steering input will leave the car turning for a little while. |
| TurnSpeedReduction | positive number (0-1) | 0.1 | By how much is the speed of the vehicle reduced when it steers. |
| Inertia | positive number (0-1) | 0.7 | Increasing this value will make the throttle input more "mellow". With a high "inertia" value, a forward input will linger for a little while after the forward key is released. |
| SpinForceWhenTurning | positive number | 0.4 | By how much does steering also makes the vehicle spin on the vertical axis |
| BackpedalSpeedAmount | positive number (0-1) | 0.6 | How much of the max speed is available when backpedaling |
| GroundRepulsion | positive number | 6 | How much does the ground repel the car. Increasing this value will make the car more bouncy. |
| GroundCheckLength | positive number | 0.6 | How far from the ground can the car be before starting to be repelled. If the vehicle has issues with ground collision (like jumping from the ground when the speed reaches a certain threshold), increase this value to make the car a little more stable. This value should also stay correlated with the size of the tires: for bigger tires, increase this value accordingly. |
| AirControlAmount | positive number | 0.15 | How much of the vehicle's control remains when it is floating in the air above a fan. This is not a general, all purpose air control. Air control is only available when floating because of a fan. |
| FrontTiresPosition | number | 1.25 | The position of the front tires relative to the center of the car (0), on the forward axis. |
| RearTiresPosition | number | -1.90 | The position of the rear tires relative to the center of the car (0), on the forward axis. |
| TiresHeight | number | -0.05 | The position of all tires relative to the center of the car (0), on the vertical axis. |
| TiresSpacing | number | 1.5 | The distance between left and right tires, on the horizontal axis. |
| FrontTiresModelPath | text | empty | The relative virtual path to the OBJ model used for the front tires. If this is left empty, default tires will be used. |
| BackTiresModelPath | text | empty | The relative virtual path to the OBJ model used for the back tires. If this is left empty, the same model as the front tires will be used. |
| HeadlightsColor | Color | r:1 g:1 b:1 |
The color used for headlights. |
| HeadlightsHeight | number | 0.332 | Height of the headlights relative to the center of the car (0). The headlights are usually placed inside the car to get a nice gradient on the track elements and avoid visual glitches. |
| FrontHoverPointsPosition | number | 1.25 | The hover points are the anchor points used to push the car away from the ground and simulate correct car physics. Each car has 4 hover points, and they are usually placed at the exact same position as the tires, but slightly above (0.1 or 0.2 meters higher on the vertical axis). These four properties work exactly like the Tire... properties of the same name, seen above in the table. If your vehicle is tilted backwards or frontwards a little bit, you can try advancing the front hover points or sliding the rear hover points backwards a little bit to fix the vehicle's orientation. |
| RearHoverPointsPosition | number | -1.90 | |
| HoverPointsHeight | number | 0.1 | |
| HoverPointsSpacing | number | 1.5 |
ℹ Note
If you're unsure about what values should some of these properties have, do not worry: you can leave them to their default value for now.
ℹ Note
Not all of these values can be edited with the vehicle editor. The vehicle editor takes care of some of these automatically (hover points are placed automatically depending on the tires, headlights are always white, etc) and only a single tire model can be given (same model for front and rear tires). The sound and pitch of the engine are also decided automatically depending on the given weight.
Example
Id: ToyCar
ModelPath: MODELS/TOYCAR.OBJ
ColorCount: 2
PitchMultiplier: 1.3
EngineType: MEDIUM
Weight: 2
Acceleration: 1.75
MaxSpeed: 16
TurnSpeed: 3
MaxTurn: 4
ForwardFriction: 4
TurnFriction: 5
TurnSpeedReduction: 0.1
Inertia: 0.2
SpinForceWhenTurning: 0.4
BackpedalSpeedAmount: 0.6
GroundRepulsion: 6
GroundCheckLength: 0.6
AirControlAmount: 0.15
FrontTiresPosition: 1.25
RearTiresPosition: -1.1
TiresHeight: 0.068
TiresSpacing: 1.5
FrontTiresModelPath: ''
BackTiresModelPath: ''
HeadlightsColor:
  r: 1
  g: 1
  b: 1
HeadlightsHeight: 0.33
FrontHoverPointsPosition: 1.25
RearHoverPointsPosition: -1.25
HoverPointsHeight: 0.17
HoverPointsSpacing: 1.5
Vehicle model
The vehicle model is a single OBJ file, that can be placed in any location under the VEHICLES/ directory. Usually, it is good practice to either create single subfolder (Call if MODELSif you like) for all the cars of your mod, or to create a folder named after your vehicle to store the vehicle and tire models under it.
⚠️ Warning
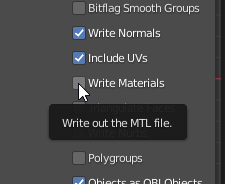
Due to the way OBJs are imported in TrackMasters, it is advised against putting any MTL files in your vehicle's subfolder, even if unused. It is highly recommended to export your OBJ without any materials.
Under Blender, this can be done by unticking the following checkbox during export:
Pivot
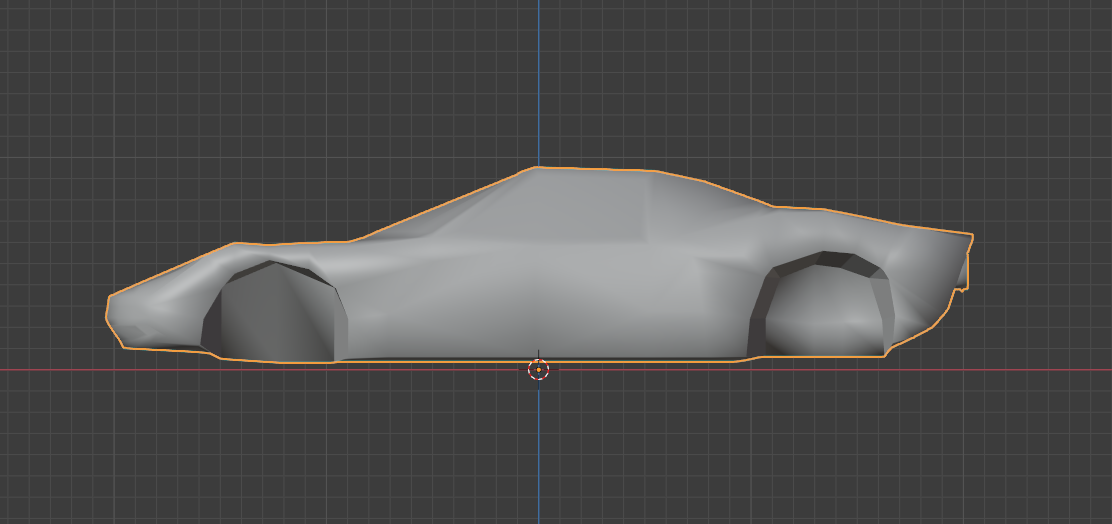
When modeling your vehicle, it is advised to keep the pivot centered relative to your vehicle (equivalent distance from the front and rear of the vehicle, and horizontally centered). That is however not true for the vertical axis.
The pivot should be, on the vertical axis, right under your vehicle. This is best practice and not actually mandatory, but it will make placing the tires later easier.
UV and texturing
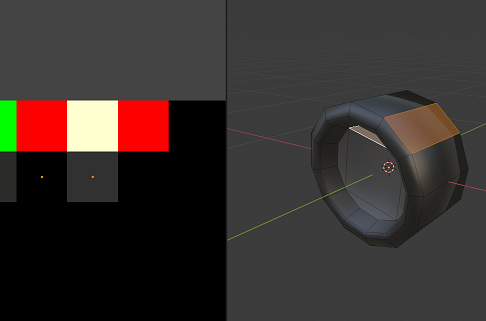
Although you cannot indicate a texture for your car, the game will apply a texture on it, the colors of which will be decided by the player.
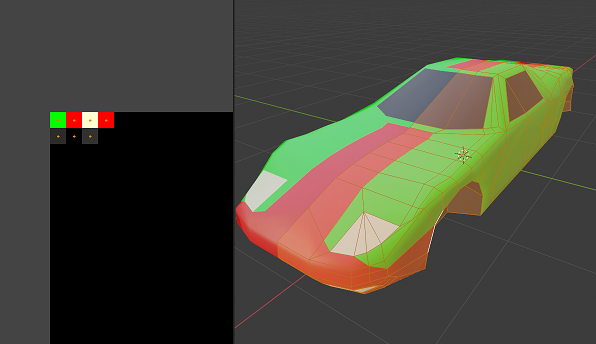
For your car to work correctly with these colors, you need to map your UVs to the game's vehicle texture. This texture is provided below:
T_car_composite.png
0 kB
Tue Mar 23 2021 15:30:57 GMT+0100 (Central European Standard Time)
Take a good look at the top left corner of the texture. This area is the palette of the texture, and this is where your UVs should be placed. Cars can only have solid colors, and the palette provides a total of 7 colors:

- The primary color of the car (represented green, chosen)
- The secondary color of the car (represented red, chosen by the player)
- A front headlights color (affected by the time of day)
- A rear headlights color (affected by the time of day)
-
-
- Three shades of grey
-
You can rearrange your UVs to form single dots that you can place accross the palette to shade your car in different manners.
ℹ Note
You can use either the primary and secondary color, just the primary, or none of them in your UVs. However, this number must be reflected in the
ColorCountproperty of the definition: otherwise, some parts of the vehicle may be rendererd incorrectly.
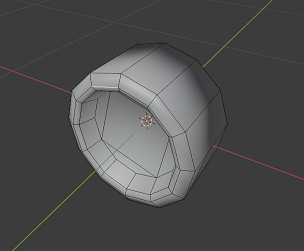
Tires pivot
The pivot for custom tire models should be at the exact center of the tire, on all three axis.
Tires UV
Primary and secondary colors, aswell as headlight colors, will not work on tires. So far, only the shades of grey can be used.
Using the vehicle editor
The vehicle editor is mainly intended as a way to place the tires on your car easily, aswell as to edit the handling and behaviour of your car with simplicity.
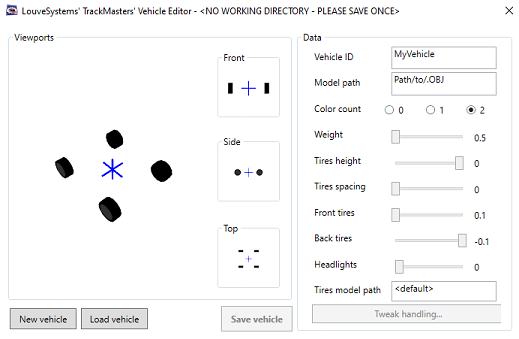
You can open existing car definitions, as long as all the paths they reference (model path, tires model path, etc) are reachable from the opened car definition's path. If the definition was moved without the models, opening the definition might trigger warnings that the models are missing.
By default if you create a new vehicle, the vehicle editor does not know in which folder to find the models for your car, and will not load any. To be able to visualize models for your vehicle sheet, you need to save it at least once, in the desired location (usually in your work directory, in the subfolder VEHICLES). Once this is done, relative paths that you'll write in Model path and Tires model path will be valid and the models they point to will be loaded automatically.
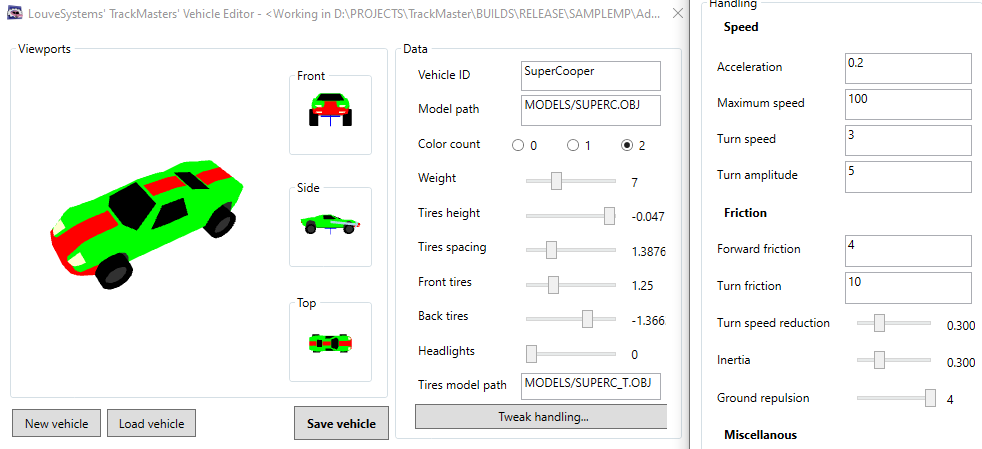
Example with a loaded car
Notice the window title - if the tool is aware of the working directory (if you have opened an existing definition file or saved the file you were working on), the title will go from "NO WORKING DIRECTORY" to display your actual current working directory.
Full example
The game comes with an example modpack containing two vehicles for you to examine and play with. The sources of this modpack are included in the SAMPLEMP/AdditionalCars folder in the game's root directory, but you can also download the compiled modpack below if you need it:
ADDITIONALCARS.PAK
109 kB
Mon Mar 22 2021 15:58:59 GMT+0100 (Central European Standard Time)
